
Translated material
We write our robot in Python. Lesson 2

We write our robot in Python. Lesson 2
Create a virtual environment and install third-party libraries
We continue our journalistic project, in which we will put our journalistic knowledge into practice - we will write a robot in Python that will collect the largest government contracts in Russia weekly (or daily, as you wish), package them in an easy-to-analyze form and send them to us by email.
In the first lesson, we installed the Visual Studio Code editor and learned basic terminal commands. Today we will talk about the virtual environment of the project and install some necessary libraries.
Why do you need a virtual environment?
When you write something in Python, you will almost always use third-party libraries. These libraries have different versions. Different applications may use the same libraries, but in different versions, and if the version of the library does not match the one required by the application, crashes may occur. Just in order to avoid such mistakes, you need to create a virtual environment.
Creating a virtual environment
We open our main.py project in Visual Studio Code and check which version of Python we are currently running. To do this, type type python3 in the terminal. I have 3.7, which is the main version of Python installed on my computer. Your location path may be different if you installed Python using Anaconda.

There are several ways to create a virtual environment in Python. We will use the Pipenv tool - first we need to install it. We write the command pip install pipenv in the terminal and press “Enter”. pip is a package manager that allows you to install third-party libraries, install is the installation command, and pipenv is the name of the library.

The library is installed, now we create a virtual environment - type pipenv shell and execute the command. We should receive a message that the virtual environment has been successfully created.
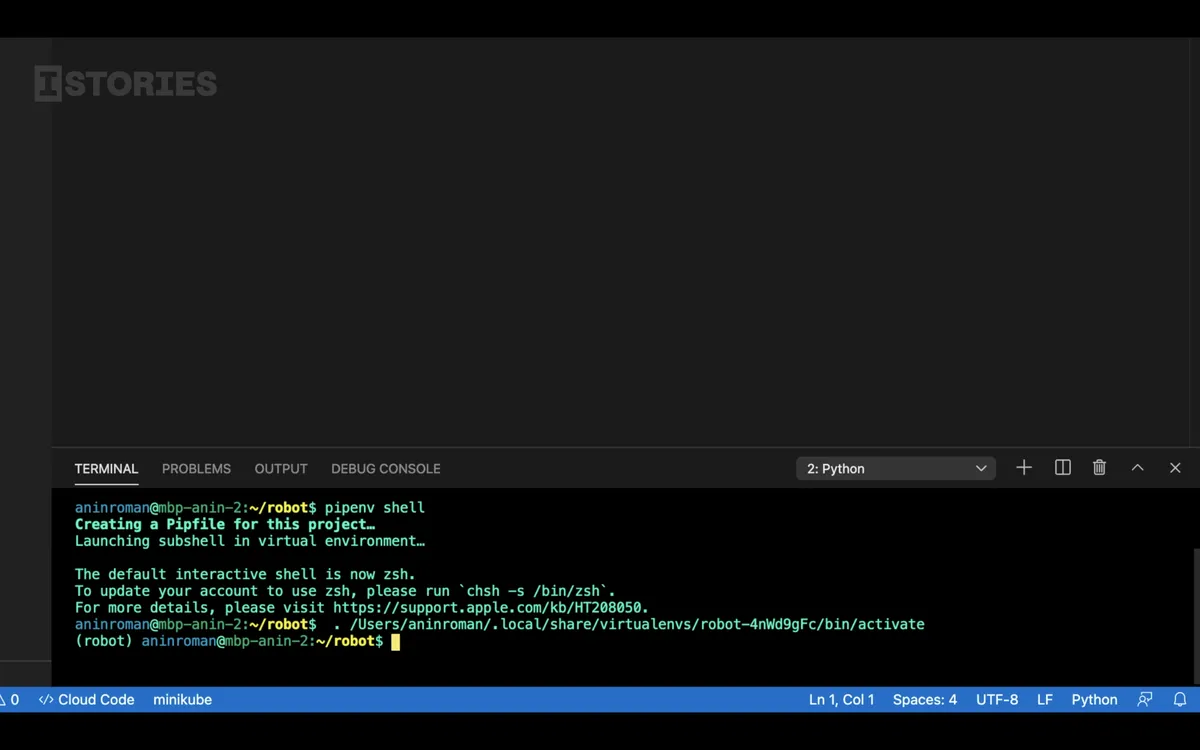
Let's check our version of Python again - enter type python3 . Now we have another version, isolated in its own virtual environment.

To make sure that we are working with this particular version of Python, press Command ( Ctrl for Windows) + Shift + P - the control panel line appears at the top. There we look for the “Select Interpreter” option. We need to select exactly the interpreter that we installed in the virtual environment. For us, its name begins with “robot”, so we type “robot” in the same line and click on the full name that appears.

If this list does not contain the path to the desired version of Python, then you can “kill” the terminal - click on the trash can icon in the terminal window, Command/Ctrl + Shift + P again and repeat the operation with “Select Interpreter”. Even if this doesn't help, try closing and reopening the Visual Studio Code application.
This is how we set up the virtual environment. Now, every time we open our project, we will only need to activate it - to do this, we need to enter the already familiar pipenv shell command in the terminal.
After creating the virtual environment, a file called “Pipfile” appeared in the application folder. It lists the requirements and required packages for our project. There are no third-party libraries in our project yet, so the only requirement for now is Python version 3.7.
Installing the first library
The first library that we will need for our project is Requests, with its help we will make requests and receive data from the Internet. To install, type pipenv install requests in the terminal and press “Enter”.
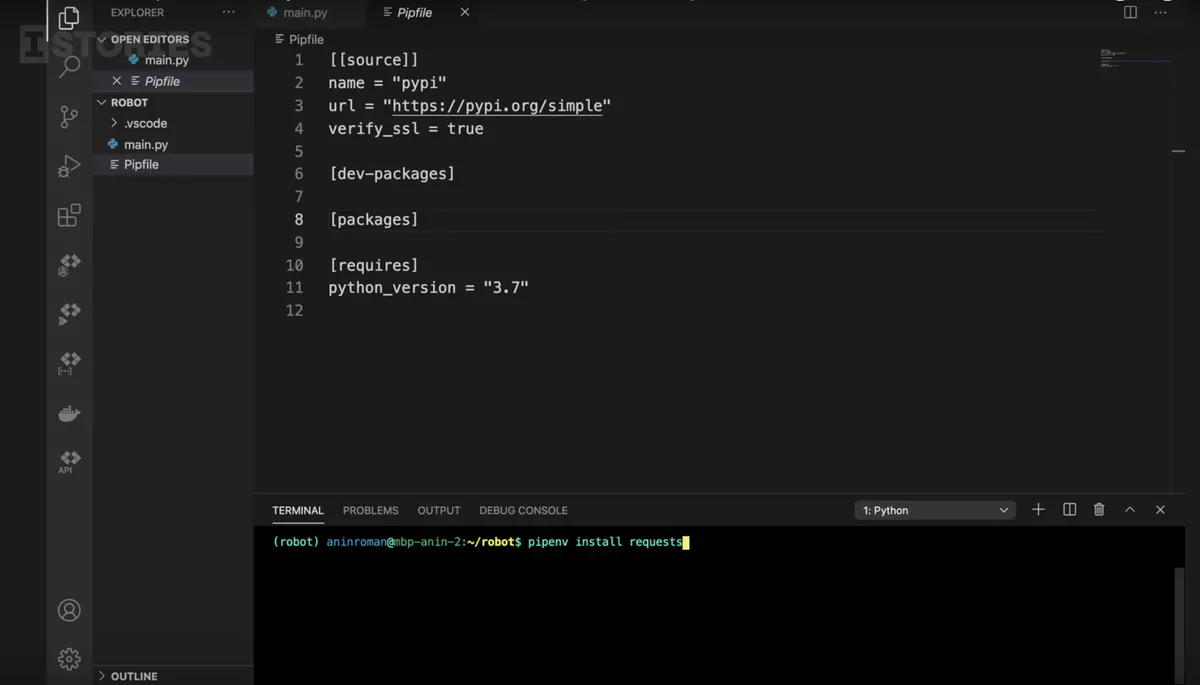
If we open our Pipfile, we will see that the Requests library appears in the list of requirements. In addition, another new file appeared in the project folder - “Pipfile.lock”.

This contains extended information about our packages - for example, the exact version of the Request library that we installed.

That's all for today. And in the next lesson we will finally start writing code and working with real data. Do you have any questions? Write to our chat on Telegram, we will try to answer.
Support thosewho is telling the truth! You can become our donor by making a one-time or monthly donation. We want to depend only on you - those who want to know the truth, those who are not afraid to be free. Help us tell you the Stories That Matter.Support Important Stories